I remember the night I finally quit my big-box gym. The monthly dues had hiked again, the locker room smelled like a damp basement, and the only squat rack was perpetually occupied by someone filming their 'pump' for social media. I went home, opened a notebook, and started designing home gym layouts while scrolling through equipment sites at 2 AM.
The problem is, most people do this in reverse. They buy the shiny new toys first and then realize their barbell is literally too long to fit in their spare bedroom. It is a recipe for frustration and a lot of wasted shipping fees. Before you drop three grand on a setup, you need to treat your floor plan like a game of high-stakes Tetris.
- Always measure your ceiling height before buying a rack with a pull-up bar.
- Account for 'ghost space'—the area you need to actually move around the gear.
- Use the Zone Method to prevent your floor plan from becoming a cluttered mess.
- Anchor the room with your largest, heaviest piece of equipment first.
The Tape Measure Comes Before the Credit Card
I have seen it a hundred times in the home gym community. You get a little extra cash and immediately want to buy your home gym equipment. You hit 'order' on a 7-foot Olympic bar and a 48-inch wide power rack because they look killer in the professional photos. Then the freight truck arrives, and reality sets in.
You set everything up and realize you have exactly three inches of clearance on either side of the bar. You cannot even slide a 45-pound plate onto the sleeve without gouging the drywall or bruising your knuckles. A standard barbell is about 86 inches long. If your room is only 9 feet wide, you have just created a claustrophobic nightmare. Start with the tape measure, not the shopping cart. Map out the 'footprint' plus a 2-foot buffer on all sides for loading.
How to Design a Home Gym Using the 'Zone' Method
When people ask me how to design a home gym, I tell them to stop looking at individual pieces and start looking at zones. I divide any raw space into three distinct buckets: The Heavy Zone, The Movement Zone, and The Wall Zone.
The Heavy Zone is where your rack and platform live. This area is non-negotiable and requires the most floor protection—usually 3/4-inch rubber stall mats. The Movement Zone is your 'open' space for lunges, kettlebell swings, or stretching. Finally, the Wall Zone is for vertical storage. If you do not designate a Wall Zone for your plates and dumbbells, they will migrate into your Movement Zone, and you will end up tripping over a 25-pounder mid-set. It keeps the flow logical and the floor clear of 'gear creep.'
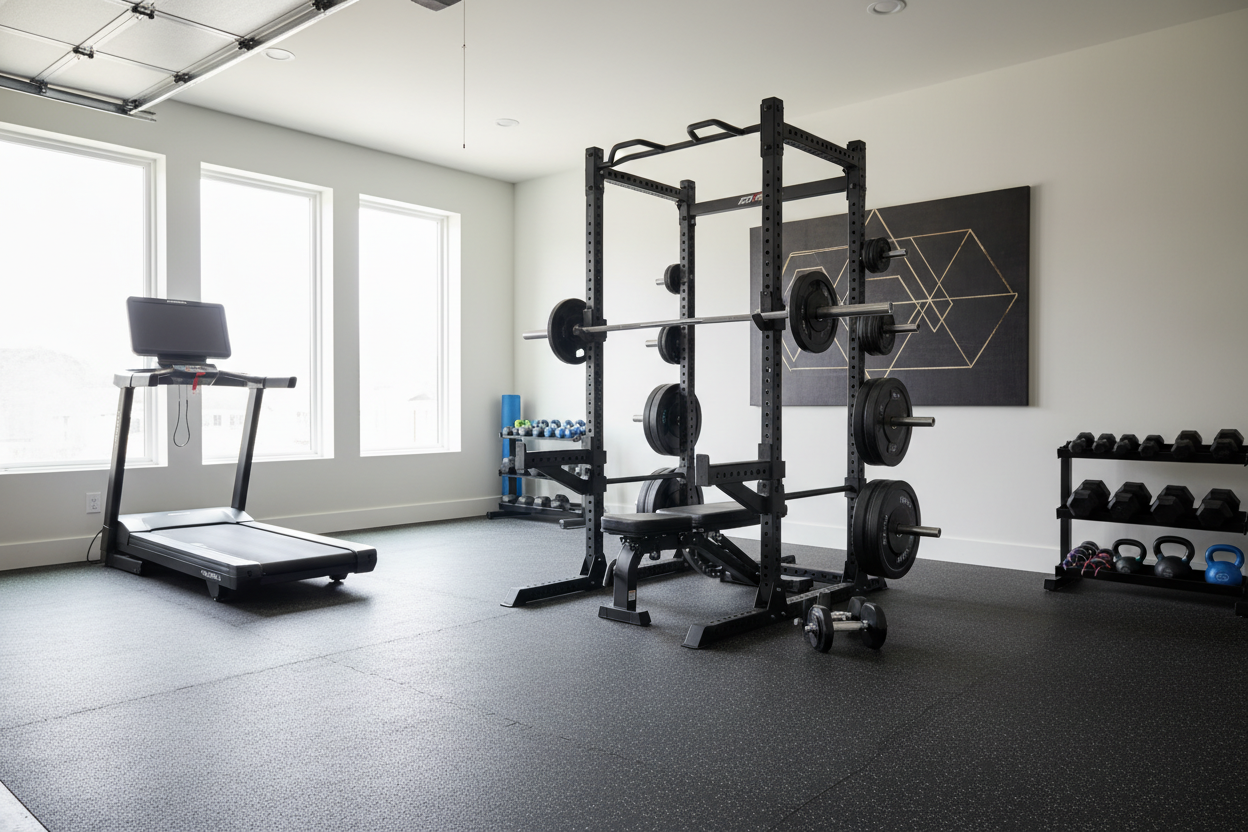
Anchor Your Layout Around the Heavy Artillery
Every gym has a 'North Star'—the one piece of equipment that is so big, heavy, or bolted down that everything else must revolve around it. For most, it is a power rack. For others, it might be a massive Smith machine home gym station. Because these units take up the most vertical and horizontal real estate, they go in first.
Do not put your rack in the middle of the room unless you have a massive warehouse. Shove it against a wall or in a corner to maximize your open floor space. Just make sure you leave enough room behind the rack to clean the floor or adjust any rear-mounted cable attachments. If you anchor the big stuff correctly, the rest of the layout falls into place. If you start with the small stuff, you will find yourself moving a 500-pound rack three inches to the left just to fit a dumbbell tree.
The Hidden Clearances You Are Going to Forget
Planning a home gym isn't just about the footprint of the metal; it is about the 'ghost space' required to use it. I once helped a buddy set up a beautiful rack, only to realize he couldn't do a single pull-up because his head would hit the ceiling joists. He forgot to account for his own height above the bar.
You also need to consider cable travel. If you have a functional trainer, the cables might extend 8 feet out from the machine. If your bench is in the way, that machine is half-useless. Accounting for these clearances early helps you price out a real gym set that actually fits your physical space. There is no point in buying a commercial-grade lat pulldown if you have to sit on the floor to use it because the seat is too high for your basement ceiling.
Scaling Up: When It Is Time to Claim a Bigger Room
There comes a day when the 10x10 spare bedroom just feels like a closet. Maybe you are tired of the 'clink-clank' of iron waking up the kids, or you have finally outgrown your adjustable dumbbells. That is when you look toward the garage or the basement. Moving into a larger footprint changes the game entirely.
When you start designing a home with gym space that is permanent, you have to think about logistics like floor slope. Most garage floors are slanted for drainage, which means your squat rack will be lopsided unless you shim it or build a level platform. It is a headache, but having 400 square feet of dedicated iron beats a cramped bedroom every single day. Just be prepared for the climate control battle—garages are either a sauna or a walk-in freezer.
How much floor space do I actually need?
For a basic barbell setup, aim for at least an 8x10 foot area. This allows for a standard 7-foot bar and enough room to walk around it without performing a balancing act while carrying heavy plates.
What is the best flooring for a garage gym?
Skip the colorful foam tiles you see at big-box stores. They compress under heavy weight and tear easily. Go to a farm supply store and buy 3/4-inch thick rubber horse stall mats. They are indestructible, provide the best vibration dampening, and do not slide around during dynamic movements.
Can I put my gym on the second floor?
You can, but be smart. A rack and some dumbbells are fine. However, if you plan on deadlifting 400+ pounds and dropping it, you are going to crack your ceiling downstairs eventually. If you must lift upstairs, invest in high-quality 'drop pads' to save your subfloor and your relationship with whoever lives below you.
Share:
The 'Boring' Truth About the Most Effective Exercise Equipment for Home
The Real Reason Your Home Lifting Weights Machine Feels Awkward